
How to Insert Hearing Aids?

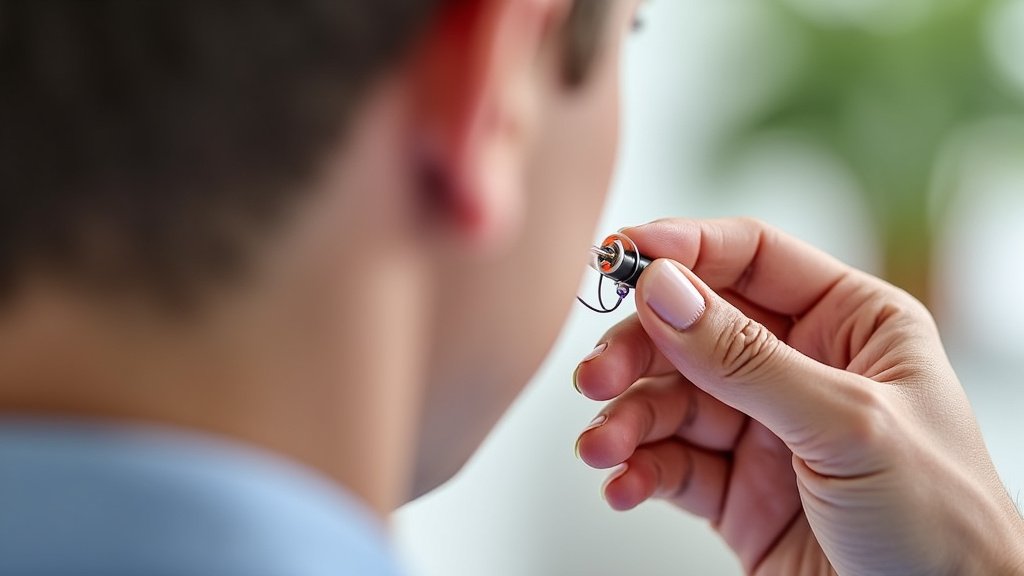
To insert hearing aids, gently hold the device with your thumb and forefinger, orienting it correctly for your ear. Then, guide it carefully into your ear canal until it feels snug and comfortable. This simple process helps ensure you get clear sound right away.
Many people starting with hearing aids wonder about the best insertion technique for comfort and effectiveness. We found that proper placement is key to avoid whistling feedback and to hear your best. It really makes a difference in your daily experience.
- Identify the correct hearing aid for each ear (left/right).
- Angle the hearing aid correctly before insertion.
- Gently push the hearing aid into the ear canal.
- Adjust until it feels comfortable and secure.
- Check for proper function right after insertion.
Let’s walk through exactly how to insert hearing aids step by step, so you can confidently manage your devices every day.
Mastering Your Hearing Aid Insertion
Learning to insert your hearing aids like a pro makes a big difference in your day. It ensures you get the best sound quality and feel comfortable. Let’s explore how to make this daily task easy and confident.
Preparing Your Device and Ear
Before you even think about putting a hearing aid in, a little preparation goes a long way. This step sets you up for success, making insertion smoother and more
hygienic.
Cleanliness is Key
Think of your hearing aids like tiny, sensitive instruments. Keeping them clean is essential for performance and hygiene. Always wash your hands thoroughly with soap and water before handling your devices (National Institute on Deafness and Other Communication Disorders, NIDCD).
This simple act prevents transferring dirt, oil, or germs into your ear canal. A clean hearing aid also works better and lasts longer.
Identifying Left and Right
Hearing aids are almost always custom-fitted for each ear. This means your left hearing aid won’t fit correctly in your right ear, and vice versa. How do you tell them apart?
Many manufacturers use a color-coding system. Red often indicates the right ear, and blue indicates the left. You might also find small “L” and “R” engravings on the devices themselves.
Double-check this each time, especially if you’re new to using hearing aids. Getting them confused can lead to discomfort and poor sound.
Checking for Damage and Wax Buildup
Before insertion, take a quick look at your hearing aids. We recommend a brief visual inspection. Are there any cracks or bent parts? Is the sound opening clear?
Excessive earwax or moisture can block the sound port, reducing sound quality. We found that cleaning your hearing aids regularly, as directed by your audiologist, helps keep them in top shape. A small brush or wax pick can clear small obstructions.
Step-by-Step Insertion for Different Types
While the general goal is the same, how you insert a hearing aid varies slightly depending on its style. We’ll cover the most common types: BTE and ITE/canal models.
Inserting Behind-The-Ear (BTE) Hearing Aids
BTE hearing aids sit behind your ear, with a thin tube or wire going into your ear canal. This style is popular and often quite robust.
- Place the main unit: Gently place the larger portion of the hearing aid behind your ear. It should rest comfortably, snug against the curve of your ear.
- Insert the ear mold/dome: Hold the ear mold or dome between your thumb and forefinger. Guide it towards your ear canal. The goal is to fit it snugly without forcing it.
- Angle and push: Angle the tip of the ear mold/dome slightly downward and forward. Push it gently but firmly into your ear canal until it feels secure. You might need to wiggle it a bit to get it past any curves in your canal.
- Check for tubing: Ensure the tube or wire connecting the main unit to the ear mold/dome isn’t twisted or pinched. It should lay flat against your skin.
Inserting In-The-Ear (ITE) and Canal Hearing Aids (ITC/CIC/IIC)
These hearing aids fit entirely or almost entirely within your ear canal. They are often smaller and more discreet.
Many of these models have a small “pull cord” or removal string. This string usually points towards the back of your ear when inserted correctly.
- Orient the device: Hold the hearing aid with the smallest end pointing towards your ear canal. Look for the “L” or “R” marking if you missed it earlier. The faceplate, which contains the battery door and microphone, should generally be facing outwards or slightly forward.
- Guide into the canal: Gently push the hearing aid into your ear canal. You might need to angle it slightly, following the natural curve of your ear.
- Rotate and secure: As it enters, you may need to give it a slight twist or rotation to get it past the entrance of your ear canal. For custom-fit devices, it will often “click” into place when properly seated. It should feel secure and comfortable, not loose or painful.
- Check the pull cord: If your device has a pull cord, make sure it’s accessible and points towards your neck or the back of your ear. This makes removal much easier.
Troubleshooting Common Insertion Challenges
Even with practice, you might run into a few snags. Don’t worry, these issues are common, and often have simple solutions.
Dealing with Discomfort
Your hearing aids should feel comfortable, not painful. If you’re experiencing pain, it’s a sign that something isn’t quite right. New users sometimes report a feeling of fullness or pressure, which usually subsides as you adjust.
If there’s persistent pain, remove the hearing aid and try reinserting it. If the pain continues, or if you notice any sores or irritation, contact your audiologist. They can check the fit and make adjustments (Mayo Clinic).
Preventing Feedback (Whistling)
That annoying whistling sound, or “feedback,” is a common issue. It often means sound is leaking out of your ear canal and being picked up by the hearing aid’s microphone. This forms a loop, causing the whistle.
We found that proper insertion is the primary way to prevent feedback. Ensure the hearing aid is seated snugly in your ear. If it’s still whistling, try removing and reinserting it. Sometimes just moving your hand too close to your ear can cause temporary feedback.
If feedback persists after proper insertion, the fit might be off, or the hearing aid settings might need adjustment. Your audiologist can help diagnose and fix this problem.
When It Just Won’t Fit Right
Sometimes, no matter what you do, the hearing aid just doesn’t seem to sit correctly. This can be frustrating, but don’t force it. Forcing the device can damage your ear or the hearing aid itself.
It could be that the hearing aid is designed for the wrong ear, or perhaps earwax is blocking the canal. If you’ve tried reinserting it a few times and it still feels wrong, it’s best to consult your hearing care professional. They can offer guidance or adjust the fit.
Final Checks and Daily Habits
Once your hearing aids are in, you’re almost ready to go! A few quick checks and good daily habits will ensure you get the most out of your devices.
Listening for Proper Function
After inserting your hearing aids, the first thing to do is a quick sound check. Can you hear? Does sound seem clear? Try speaking a few words or listening to a familiar sound.
If something sounds off – too quiet, distorted, or simply not working – check the battery first. Sometimes a dead or poorly seated battery is the culprit. We also recommend making sure the volume isn’t accidentally turned down.
Developing a Routine
The best way to master hearing aid insertion is through consistency. Develop a routine that works for you. Many people find it helpful to insert their hearing aids each morning as part of their getting-ready process.
Here’s a simple checklist we’ve put together:
- Wash hands thoroughly.
- Identify left/right hearing aids.
- Inspect devices for clarity and damage.
- Insert carefully according to type.
- Perform a quick sound check.
- Clean devices nightly after removal.
Sticking to these steps will make insertion second nature and help maintain your hearing aids.
Knowing When to Seek Professional Help
While most insertion issues are minor, some problems require professional attention. You should contact your audiologist if:
- You experience persistent pain or irritation in your ear.
- Your hearing aid consistently whistles despite proper insertion.
- The device feels loose or falls out frequently.
- You notice changes in your hearing or the sound quality.
- You can’t insert the hearing aid after multiple attempts.
Remember, your hearing care professional is your partner in this journey. They are there to help ensure your hearing aids work effectively and comfortably for you.
Conclusion
You’ve taken a big step towards better hearing by learning to insert your hearing aids confidently. Remember, practice makes perfect. The more you follow these steps, the more natural it will become. Consistency in care and insertion is essential for optimal performance and comfort. We found that a good routine protects your investment and enhances your daily listening experience.
If you encounter persistent issues, don’t hesitate to reach out to your hearing care professional. They are your best resource for personalized support. With proper technique, you’ll be enjoying clearer sound every day.
Frequently Asked Questions
How long does it take to get used to inserting hearing aids?
Most people can comfortably insert their hearing aids within a week or two of consistent practice. It’s a new skill, so be patient with yourself. We found that establishing a daily routine significantly speeds up the learning process.
My hearing aid whistles even after I insert it correctly. What should I do?
Persistent whistling, even with proper insertion, can indicate a few things. Your earwax might be blocking the ear canal, or the fit might need adjustment. We recommend contacting your audiologist to check for earwax buildup or to adjust the hearing aid’s settings or fit.
Can I use lubricant to help insert my hearing aid?
It’s generally not recommended to use lubricants unless specifically advised by your audiologist. Certain substances could damage the device or irritate your ear. If insertion is consistently difficult, speak with your hearing care professional about alternative solutions or a refitting.
What if my hearing aid feels loose after I insert it?
A loose-feeling hearing aid is typically a sign of an improper fit. It might not be seated securely in your ear canal or the earmold/dome could be the wrong size. We found that a loose fit can also lead to feedback. Your audiologist can assess the fit and make necessary adjustments or recommend a different dome size.
How often should I clean my hearing aids after taking them out?
You should perform a basic cleaning of your hearing aids every night after you remove them. This involves wiping them with a dry cloth and using any specific tools provided by your audiologist to clear wax. We found that a consistent nightly cleaning routine helps maintain performance and extends the life of your devices.
