How to Remove a Hearing Aid Dome?
On this page (8 sections)
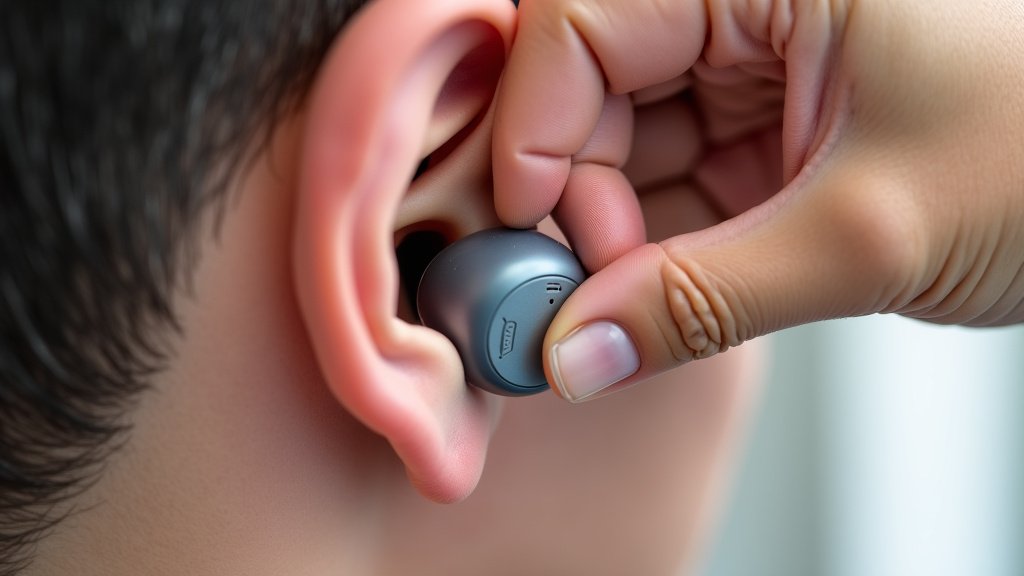
To remove a hearing aid dome, gently grip the dome near the receiver wire and pull it straight off. If it feels stuck, try twisting it slightly while pulling. You’re aiming for a clean detachment without damaging the wire or the earhook.
Replacing or removing these small domes is a common task for hearing aid users. They can wear out over time or get clogged with earwax. Knowing how to do this yourself can save you a trip to the audiologist for a simple maintenance job, keeping your hearing aids working at their best performance.
- Grip the dome firmly but gently.
- Pull it straight off the receiver wire.
- Twist slightly if it’s difficult to remove.
- Be careful not to damage the wire.
Ready to learn the easy way to swap out that hearing aid dome? We’ll guide you through the simple steps so you can keep your device clean and clear.
Swapping Out Your Hearing Aid Domes
Removing and replacing the tiny domes on your hearing aids might seem a little daunting at first. You’re probably thinking, “What if I break it?” Don’t worry, we’ve all been there! It’s a routine maintenance task. Think of it like changing the tip on a pen. With a little gentle guidance, you’ll be a pro in no time. This guide will walk you through the process, step-by-step, so you can keep your hearing aids functioning at their absolute best.
These little domes, often called tips or receivers, are crucial for directing sound. They sit in your ear canal. Over time, they can become less effective. Earwax buildup is a common culprit. They can also simply wear out from daily use. Knowing how to change them yourself can save you time and money. Plus, it gives you a hands-on way to ensure your hearing aids are always clean and delivering clear sound.
Understanding Your Hearing Aid Domes
Before you start pulling, let’s get a better picture of what we’re dealing with. Hearing aid domes are small, flexible attachments. They connect to the end of the receiver wire. This wire then usually disappears into your ear canal. The dome’s job is to sit comfortably and direct the amplified sound directly to your eardrum. They come in various sizes and styles, too!
Types of Hearing Aid Domes
You’ll typically find a few main types. There are open domes, which have tiny holes. These allow some natural sound to pass through. They’re great for mild hearing loss. Then there are closed domes. These are solid and block more sound. They offer a better seal for moderate to severe hearing loss. Some advanced styles might even have multiple “flaps” or different textures for a custom fit. Knowing which type you have helps with understanding its function and replacement.
Why Domes Need Replacing
So, why the need for this little swap? Several reasons contribute to dome wear and tear. Earwax is a major factor. It can clog the dome’s openings, muffling your sound. Over time, the material itself can degrade. This might be due to moisture, body oils, or just regular use. A worn-out dome can become stiff, crack, or lose its shape. This can lead to discomfort or a poor fit. Replacing them ensures optimal sound quality and comfort. Many hearing health professionals recommend changing them every 3 to 6 months (Better Hearing Australia).
Preparing for Dome Removal
Getting ready is half the battle, right? You don’t need a whole toolkit for this. Just a few simple things will set you up for success. A clean, well-lit area is your best friend here. Think of it like changing a guitar string; you want a clear workspace. This helps prevent tiny parts from rolling away into the abyss. Have your replacement domes handy. You don’t want to remove the old one only to realize the new one is missing!
Gathering Your Supplies
What do you actually need? Not much! Start with your hearing aids, of course. Make sure they are powered off. This prevents any accidental beeps or feedback. You’ll also need your new replacement domes. It’s a good idea to have them readily accessible. Some people find a small, clean cloth or tissue helpful for wiping things down. A magnifying glass can also be useful if your eyesight isn’t what it used to be, or if the domes are particularly tiny.
Ensuring a Clean Environment
Cleanliness is key. You’re dealing with something that goes into your ear. You want to avoid introducing any new germs or debris. Find a spot on a table or counter that you can easily clean. Maybe wipe it down with a disinfectant wipe beforehand. Wash your hands thoroughly with soap and water. This simple step protects both your hearing aid and your ear. A clean dome means better sound and a healthier ear canal. Many audiologists stress the importance of this preparatory step (Hearing Loss Association of America).
Step-by-Step: Removing the Old Dome
Now for the main event! This is where we gently coax the old dome off. Remember, the key here is a gentle but firm grip. Don’t yank or pull too hard. You’re working with delicate electronics. The receiver wire can be surprisingly fragile. We want to avoid damaging it. If it feels stuck, a little bit of wiggling can work wonders. Think of it like unscrewing a stubborn jar lid; a slight twist can help break the seal.
Locating the Dome and Wire Connection
Take a close look at the end of your hearing aid. You’ll see the receiver wire extending outwards. At the very tip of this wire is the dome. It’s usually a small, bulbous piece. You need to get your fingers around the base of the dome. This is where it connects to the wire. Avoid grabbing the wire itself. You want to pull on the dome, not the wire. Grasping the wire can damage the delicate internal components.
The Gentle Pull-Off Technique
Once you have a good grip on the dome’s base, it’s time to pull. Apply steady, gentle pressure. Pull the dome straight away from the wire. It should slide off. If it resists, try a very slight twisting motion. Imagine you are unscrewing it, but with minimal force. A quarter-turn might be all that’s needed. Avoid any sudden jerks. Patience is your friend here. If it’s still stuck, check for any visible earwax buildup or debris that might be acting like glue. You can try to carefully clean that away first.
Dealing with Stubborn Domes
Sometimes, domes can feel like they’re welded on! If you’ve tried the gentle pull and twist and it’s still not budging, don’t panic. One trick is to use a small tool, like a toothpick, to gently pry around the edge of the dome. Be extremely careful not to puncture the dome or damage the wire. Another approach is to warm the dome slightly. You could try holding it between your fingers for a minute to let your body heat soften the material. This can sometimes make it more pliable. If all else fails, it might be time to consult your audiologist. They have specialized tools and techniques.
Installing the New Hearing Aid Dome
Putting on the new dome is usually much simpler than taking off the old one. The goal here is a secure fit. You want the new dome to be firmly attached to the receiver wire. This ensures that sound is transmitted effectively and the dome doesn’t accidentally come off in your ear. Again, no brute force is needed!
Aligning the New Dome
Take your new dome and look at the opening. You’ll see it’s designed to fit snugly onto the end of the receiver wire. You might notice a small lip or groove on the wire that the dome needs to grip. Line up the opening of the dome with the tip of the receiver wire.
Pushing the Dome into Place
Gently push the dome onto the wire. You should feel it start to slide on. Continue pushing until the dome feels secure. It should cover the very end of the receiver wire. Many domes have a little ridge that should sit flush with the wire. You might hear or feel a slight “click” or a snug fit as it settles into place. Make sure it’s pushed on far enough that it won’t easily slip off. Give it a gentle tug to confirm it’s attached.
Checking the Fit and Seal
Once the new dome is on, take a moment to check it. Does it look like it’s sitting properly on the wire? Is it firmly attached? You can gently try to wiggle it. It shouldn’t come off with light pressure. A proper seal is important for sound quality. If the dome seems loose or crooked, carefully remove it and try again. Sometimes, it just takes a second attempt to get it perfectly aligned.
Troubleshooting Common Issues
Even with the best intentions, you might run into a snag. It’s perfectly normal! Most problems are easily fixable. Think of it as part of the learning curve. We’ve covered a few already, but let’s recap some common hiccups and how to solve them.
Dome Won’t Come Off
As we discussed, if a dome is truly stuck, try warming it between your fingers. A gentle twisting motion is better than brute force. You can also try to carefully insert a thin, blunt object (like a toothpick or a specialized hearing aid tool) under the edge to break the seal. Always be extremely cautious not to damage the wire. If you’re still struggling, don’t risk it. Your audiologist can help.
Dome Won’t Stay On
If the new dome feels loose, it might not be the right size or type. Ensure you have the correct replacement dome for your specific hearing aid model and receiver. Sometimes, the receiver wire itself might be slightly damaged, preventing a good seal. Try pushing it on again, making sure it’s seated fully. If it continues to slip off, it’s best to contact your audiologist. They can assess the wire and ensure you have the right dome.
Sound Quality Isn’t Clear
After changing the dome, if your sound quality isn’t improved, several things could be at play. First, double-check that the dome is properly attached and creating a good seal. Then, clean the dome and the hearing aid receiver. See how to remove earwax from hearing aid receivers safely. Earwax can still be an issue! If the sound is still muffled or distorted, the problem might be with the hearing aid itself, the receiver wire, or the dome might be the wrong type for your hearing loss. It’s time to schedule a visit with your hearing care professional.
Here’s a quick checklist to make sure you’ve got it right:
- Turned off hearing aid?
- Cleaned your hands?
- Gripped dome base, not wire?
- Pulled gently, straight off?
- New dome pushed on securely?
- Dome feels snug and won’t slip?
Conclusion
You’ve successfully learned how to remove and replace your hearing aid domes! Remember, this simple maintenance task is key to keeping your hearing aids performing their best. By gently gripping the dome base and pulling straight off, or twisting slightly if needed, you can avoid damage. Installing the new dome is just as straightforward, ensuring a secure fit for clear sound. Don’t hesitate to reach out to your audiologist if you encounter any persistent issues. Taking these small steps will help you maintain optimal hearing comfort and clarity.
Frequently Asked Questions
How often should I replace my hearing aid domes?
Hearing health professionals often suggest changing your hearing aid domes every 3 to 6 months. This can vary depending on your individual ear health and the amount of earwax you produce. Regular replacement helps ensure the best sound quality and comfort.
Can I use my fingers to remove a stubborn hearing aid dome?
Yes, you can use your fingers, but be gentle. If it’s stuck, try warming it slightly with your fingers to make it more pliable. A slight twisting motion while pulling can also help break the seal without excessive force.
What if I accidentally damage the receiver wire while removing the dome?
If the receiver wire appears damaged, bent, or frayed, it’s best not to attempt further repairs yourself. Contact your audiologist immediately. They have specialized tools and knowledge to assess and repair or replace the wire without causing further harm.
Is it normal for new domes to feel a bit tight when putting them on?
Yes, it’s perfectly normal for new domes to feel snug. This tight fit is essential to ensure the dome stays securely in place and doesn’t accidentally come off in your ear canal. You should feel a firm connection when it’s properly installed.
Can I use tweezers to remove a hearing aid dome?
While tweezers might seem helpful for grip, they can easily damage the delicate receiver wire or the dome itself. It’s generally recommended to use your fingers for better control and to avoid accidental punctures or tears. If you must use a tool, opt for something blunt like a toothpick and proceed with extreme caution.