How to Remove Earwax from a Hearing Aid?

To remove earwax from a hearing aid, you’ll need a wax pick, a brush, and a soft cloth. Regularly cleaning these parts is key for clear sound. A simple daily routine prevents buildup and keeps your device working well.
Ignoring earwax can cause your hearing aid to sound muffled or stop working entirely. We found that a bit of consistent care goes a long way. Keeping your hearing aid clean helps it last longer and perform better. It’s a small effort for a big reward.
TL;DR
- Daily cleaning is best.
- Use the right tools (pick, brush, cloth).
- Focus on the sound port and microphone.
- Never use sharp objects or liquids.
- Check your user manual for specific tips.
Ready to give your hearing aids the care they deserve? We’ll walk you through exactly how to clean them effectively, step by step.
Keeping Your Hearing Aids Clear of Wax Buildup
Maintaining your hearing aids is simpler than you might think. Regular cleaning helps prevent earwax from becoming a problem. You’ll enjoy clearer sound and extend the life of your device.
Understanding Why Earwax is a Hearing Aid’s Nemesis
Earwax, or cerumen, is a natural and healthy part of your ear’s defense system. It traps dust and debris, protecting your ear canal. However, it can also be a real headache for hearing aid users.
When you insert a hearing aid, it can push wax deeper into the ear. This can lead to buildup around the sound port and microphone. Over time, this blockage makes your hearing aid sound muffled or even stop working.
We found that most common hearing aid issues are due to wax blockages. A little preventive care goes a long way. Think of it like brushing your teeth – a small daily habit with big benefits.
Gathering Your Essential Cleaning Tools
Before you start, make sure you have the right tools. Using the wrong items can damage your delicate hearing aids. We always recommend sticking to manufacturer-approved cleaning kits.
- Wax Pick/Loop: This small, wire-loop tool helps gently scoop out wax.
- Cleaning Brush: A soft-bristled brush is perfect for sweeping away debris.
- Soft, Dry Cloth: Use this to wipe down the device and remove surface grime.
- Battery Door Opener/Tool (if applicable): Some models have a specific tool for opening the battery compartment.
- Wax Guards/Filters (if needed): These tiny filters protect the sound port from wax.
You can usually find these tools in a kit provided by your audiologist. If not, they are readily available online or at hearing aid centers. Always keep your tools clean too. A dirty tool just moves dirt around.
Step-by-Step Guide to Removing Earwax from Your Hearing Aid
Ready to clean? We’ll break down the process for different types of hearing aids. The key is to be gentle and patient. Remember, these are precision devices.
Cleaning Behind-the-Ear (BTE) Hearing Aids
BTE hearing aids have two main parts: the unit behind your ear and the earmold/dome that goes into your ear canal. Both need attention.
Cleaning the Earmold or Dome
This is where most of the wax tends to accumulate. It’s the part that sits inside your ear.
- Detach the earmold/dome: Gently twist and pull the earmold or dome from the tubing. Some domes simply slide off.
- Remove visible wax: Use your wax pick to carefully remove any wax from the opening or vent of the earmold/dome. Be very gentle.
- Brush away debris: Use the small cleaning brush to sweep away any remaining wax or skin cells. Pay special attention to small crevices.
- Wipe clean: Use a soft, dry cloth to wipe down the entire surface of the earmold or dome.
For some earmolds, if they don’t contain electronics, you might be able to wash them. Many experts say you can wash non-electronic earmolds with mild soap and water (National Institute on Deafness and Other Communication Disorders). Just be sure they are completely dry before reattaching. Water can cause serious damage to the main hearing aid unit.
Cleaning the BTE Unit
The main part of the BTE unit, which sits behind your ear, also needs regular care.
- Wipe the casing: Use your soft, dry cloth to wipe the entire casing of the BTE unit. Remove any dust, sweat, or skin oils.
- Brush microphone ports: Use the cleaning brush to gently clear the microphone ports. These are tiny openings that pick up sound. Blocked ports mean muffled sound.
- Check the tubing: If you see any moisture or debris inside the tubing that connects to the earmold, gently detach it and blow through it, or use an air blower designed for hearing aids.
We found that leaving the battery door open overnight helps to air out the battery compartment. This reduces moisture buildup, which can also affect performance.
Cleaning In-the-Ear (ITE) and In-the-Canal (ITC) Hearing Aids
These smaller hearing aids are custom-made and sit mostly or entirely within your ear canal. This means they are more exposed to earwax.
- Inspect the sound port: This is the opening where sound comes out. It’s the most common spot for wax buildup. Use your wax pick to carefully dislodge any wax.
- Brush all openings: Use your cleaning brush to gently sweep away wax and debris from the sound port, microphone port, and vent (if present). Work the bristles into the tiny holes.
- Wipe the entire surface: Use a soft, dry cloth to wipe down the entire outer shell of the hearing aid. This removes oils and skin cells.
- Replace wax guards: Many ITE/ITC models have a wax guard or filter that protects the receiver. If your hearing aid has one, you’ll need to replace it regularly. Your audiologist can show you how.
It’s vital to be extra careful with ITE/ITC devices. Their components are packed tightly together. Never push wax further into the device. Always try to pull it out.
Cleaning Completely-in-the-Canal (CIC) Hearing Aids
CIC hearing aids are the smallest and sit deepest in your ear canal. They are the most prone to wax buildup and require daily attention.
- Focus on the sound port: This is almost certainly where you’ll find wax. Use your wax pick with extreme care to remove any blockages.
- Brush the vent and microphone: Gently brush any other small openings to clear them of debris.
- Wipe the casing: A quick wipe with a dry cloth will remove surface grime.
- Replace wax guards frequently: CIC devices often rely heavily on wax guards. Check and replace them as recommended by your audiologist, usually every few weeks.
Because CIC hearing aids are so small and deep-seated, some people find them harder to clean. Don’t hesitate to ask your audiologist for a demonstration or even for them to do a deep clean every few months.
Essential Do’s and Don’ts for Hearing Aid Cleaning
To keep your hearing aids performing their best, it’s crucial to follow some key guidelines. A few simple rules can prevent costly repairs.
The Golden Rules: What You SHOULD Do
Following these practices will ensure your hearing aids stay in top condition.
- Clean daily: A quick, gentle clean each evening prevents major buildup. Think of it as a nightly ritual.
- Use approved tools: Only use the cleaning tools provided by your audiologist or specifically designed for hearing aids.
- Be gentle: Your hearing aids are delicate. Use a light touch when cleaning.
- Wash your hands first: Clean hands prevent transferring dirt and oils to your hearing aids.
- Open battery doors at night: This helps dry out moisture and prolong battery life.
- Store in a dry place: Keep them in their case or a dehumidifier overnight.
- Schedule professional check-ups: Your audiologist can perform a thorough deep clean and check for issues.
We found that consistent, gentle cleaning is the most effective way to prevent problems. It’s a small investment of time that saves you hassle later.
What You Should NEVER Do (And Why)
These actions can cause irreversible damage to your hearing aids. Avoid them at all costs.
- Never use sharp objects: Toothpicks, needles, or scissors can puncture microphones, speakers, or tubing. This is a common mistake and very damaging.
- Never use water or liquids directly: Unless specifically instructed for a non-electronic earmold, water can corrode internal components. Even cleaning sprays should be applied to a cloth, not directly to the hearing aid.
- Never use alcohol or solvents: These can dissolve or damage the plastic casing and electronic parts.
- Never blow into the hearing aid: Your breath contains moisture, which is bad for electronics. Use a special air blower if needed.
- Never attempt DIY repairs: If something seems broken, take it to your audiologist.
- Never force anything: If a part isn’t detaching easily, don’t yank it. You might break it.
It’s tempting to try and fix things yourself, but hearing aids are complex devices. Many experts agree that improper cleaning is a leading cause of hearing aid malfunction (Cleveland Clinic).
When to Replace Wax Guards and Filters
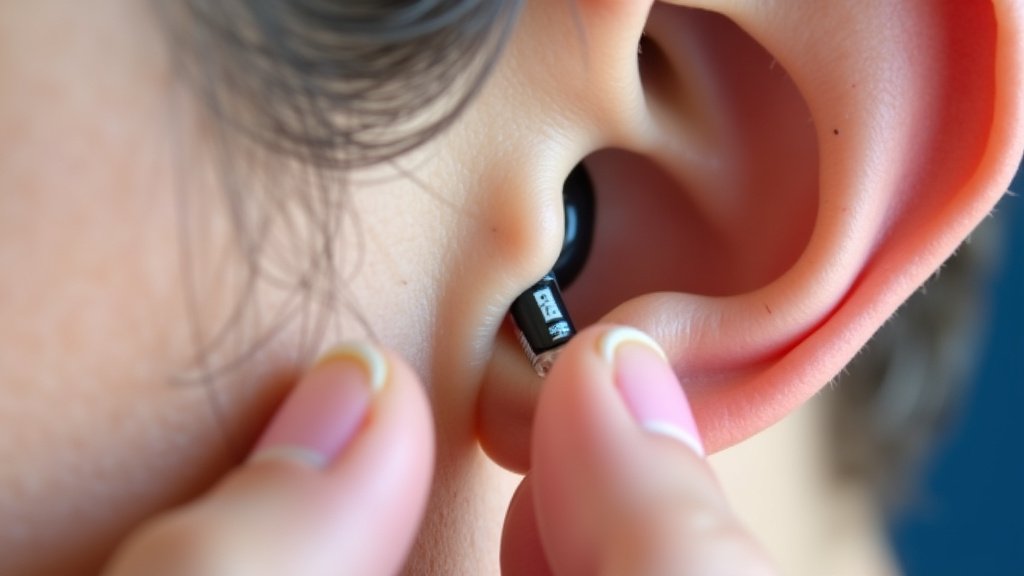
Wax guards are tiny, disposable filters that protect the sound outlet of many hearing aids. They are your device’s first line of defense against earwax.
Recognizing When it’s Time for a Change
Knowing when to replace your wax guard is key to maintaining sound quality. It’s not always obvious, but there are signs.
- Muffled sound: If your hearing aid suddenly sounds quiet or unclear, a clogged wax guard is a prime suspect.
- No sound at all: A completely blocked wax guard will prevent any sound from coming through.
- Visible wax buildup: If you can see wax packed into the tiny filter, it’s definitely time for a change.
- Manufacturer recommendation: Check your user manual; many manufacturers suggest a replacement schedule, often every 2-4 weeks.
Replacing a wax guard is usually a quick and easy process. Your audiologist will have demonstrated this when you received your hearing aids. If you’re unsure, ask them to show you again.
| Hearing Aid Type | Typical Wax Guard Frequency | Key Indicator for Change |
|---|---|---|
| BTE with Dome | Every 2-4 weeks | Muffled sound, visible wax |
| BTE with Earmold | May not have guard, check tubing | Sound blocked, earmold vent blocked |
| ITE/ITC | Every 1-3 weeks | Sound distortion, no sound |
| CIC | Every 1-2 weeks (most frequent) | Significant sound reduction, visible blockage |
Remember, this table provides general guidelines. Your individual earwax production and hearing aid model might require more frequent changes. Always prioritize what your device sounds like. If it sounds off, check the wax guard first.
Your Hearing Aid Cleaning Checklist
To help you stay on track, here’s a quick checklist you can use daily or weekly.
- Wipe down the entire device with a soft, dry cloth.
- Use the cleaning brush to clear microphone ports and vents.
- Gently use a wax pick to remove visible earwax from the sound port.
- Check and replace wax guards if sound is muffled or wax is visible.
- Open the battery door to allow air circulation.
- Store your hearing aids in a dry, safe place overnight.
This checklist makes cleaning a breeze. It helps you remember each important step. A few minutes a day can make a big difference in your hearing quality and the life of your device.
Conclusion
You now have a solid understanding of how to keep your hearing aids clean and free from earwax. We’ve walked through the specific steps for different hearing aid types and highlighted the essential tools you’ll need. Remember, a few minutes of daily care can prevent frustrating issues and costly repairs.
By consistently following these simple guidelines, you’ll ensure your devices deliver clear sound for years to come. Your proactive approach to cleaning truly makes a difference. Don’t let earwax get in the way of better hearing – take action today.
Frequently Asked Questions
Why does my hearing aid keep getting clogged with earwax?
Your ear canal naturally produces earwax to protect itself. When you wear a hearing aid, it can push this wax deeper into the canal. This makes it more likely for wax to build up around the device’s ports and block sound.
Can I use cotton swabs or Q-tips to clean my hearing aid?
No, you should never use cotton swabs or Q-tips directly on your hearing aid. These can push wax further into the delicate components. They can also leave behind cotton fibers, causing more blockages.
How often should I take my hearing aid to the audiologist for cleaning?
Most audiologists recommend a professional cleaning every three to six months. This allows them to perform a deeper clean and check for any underlying issues. Regular home cleaning helps extend the time between these visits.
What if I’ve tried cleaning it, but my hearing aid still sounds muffled?
If your hearing aid remains muffled after cleaning, it’s time to contact your audiologist. The wax guard might need replacing, or there could be an internal issue. They have specialized tools to diagnose and fix the problem.
Is there a specific time of day that is best for cleaning my hearing aids?
We found that cleaning your hearing aids at the end of each day is ideal. This allows them to dry out overnight if you open the battery door. It also prevents wax from hardening and becoming harder to remove.