How to Replace Hearing Aid Tubing?
On this page (8 sections)
You can absolutely replace hearing aid tubing yourself. It’s a common maintenance task that many hearing aid users perform at home. Doing it yourself can help keep your hearing aids sounding their best and save you a trip to the audiologist. You’ll need a few simple tools, but it’s quite straightforward.
This part of your hearing aid connects the receiver to the earmold. Over time, this tubing can become stiff, discolored, or even crack. Regular replacement ensures a clear sound path and a comfortable fit. It’s a small step that makes a big difference in hearing aid performance.
- You can replace hearing aid tubing at home.
- It’s a simple maintenance task.
- It helps keep your hearing aids working well.
- You’ll need basic tools.
- This process is important for clear sound.
Let’s walk through exactly how to get your new hearing aid tubing fitted correctly, step by step.
“`htmlReplacing Your Hearing Aid Tubing: A Step-by-Step Guide
Replacing the tubing on your hearing aids is a manageable DIY task. It’s a key part of hearing aid maintenance. Keeping this tubing in good condition ensures your hearing aids work as they should. You might be surprised at how easy it is to do at home. This process can help restore clarity to your sound. Let’s get started on how you can do this yourself.
Why Replacing Hearing Aid Tubing Matters
Over time, the tubing that connects your hearing aid to your earmold can change. It can become stiff, discolored, or brittle. This is a natural part of wear and tear. Think of it like a hose that’s been sitting in the sun. It loses its flexibility and can develop small cracks. These changes can really affect how well your hearing aids perform. A worn tube can cause sound to be muffled or distorted. It might even lead to feedback or whistling sounds. Regular replacement is essential for clear sound transmission. Many audiologists recommend replacing the tubing about If you notice earwax buildup affecting your hearing aid, learn how to remove earwax.every six months or sooner if you notice issues.
Signs Your Tubing Needs Replacing
How can you tell if it’s time for new tubing? Here are a few tell-tale signs:
- Visible Discoloration: If the tubing has turned a noticeable yellow or brown color, it’s a good sign it’s aged.
- Stiffness or Brittleness: When the tubing feels hard to the touch, it has lost its flexibility.
- Cracks or Fissures: Look closely for any small breaks or splits in the tubing material.
- Sound Distortion: If your hearing aid suddenly sounds muffled or unclear, the tubing could be the culprit.
- Feedback or Whistling: A damaged tube can sometimes cause unwanted noise.
Catching these signs early means you can address the problem before it significantly impacts your hearing. It’s better to replace it a little early than wait too long.
Gathering Your Supplies for the Job
Before you begin, make sure you have everything you need. This will make the process smoother and prevent frustration. You don’t need a lot of specialized tools. Most of what you’ll need is readily available.
Essential Tools and Materials
You’ll want to have these items on hand:
- Replacement Tubing: Make sure you have the correct size and type for your hearing aids. Your audiologist can provide this, or you can order it online.
- Small Scissors or a Craft Knife: You’ll need these to cut the tubing to the right length. Be very careful when using sharp objects.
- Pliers or a Tube Removal Tool: These can help you gently grip and pull off the old tubing. Some hearing aid kits come with a specialized tool.
- A Soft Cloth: For cleaning up any residue.
- A Well-Lit Area: Good lighting will help you see what you’re doing.
Having everything ready means you can focus on the task without interruptions. It’s like preparing your ingredients before cooking a meal.
Choosing the Right Replacement Tubing
Not all hearing aid tubing is the same. It’s important to get the right kind for your specific hearing aids. There are different diameters and materials available. Your audiologist is the best resource for recommending the correct tubing. They can tell you the exact model or specifications you need. If you’re ordering online, double-check the product description against what your audiologist recommended. Using the wrong tubing could affect sound quality or not fit properly.
Step-by-Step: Removing the Old Tubing
Now, let’s get to the actual replacement. We’ll start by carefully removing the old tubing from both the earmold and the hearing aid itself. Take your time with this part.
Detaching the Tubing from the Earmold
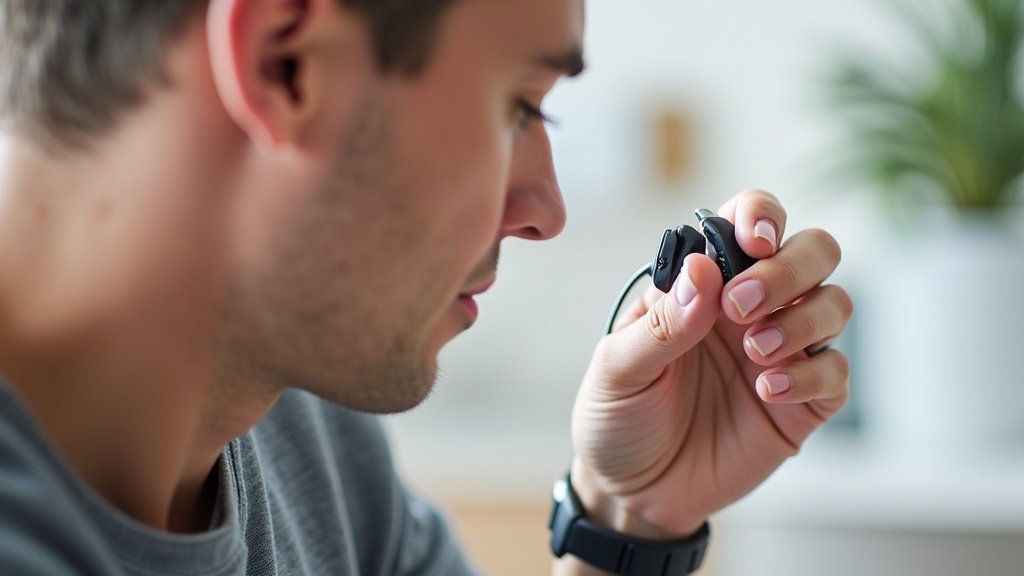
Most earmolds have a small connector where the tubing inserts. You may need to gently wiggle the tubing to loosen it. If it’s stuck, use your pliers or removal tool to get a gentle grip. Pull steadily until it slides off. Try not to force it, as you don’t want to damage the earmold. Sometimes, a tiny bit of warm water can help soften old tubing, making it easier to remove. Just be sure to dry it thoroughly afterward.
Removing Tubing from the Hearing Aid Body
The other end of the tubing connects to the hearing aid’s sound outlet. This connection can also be a bit snug. Use your pliers or removal tool here as well. Grip the tubing close to where it meets the hearing aid. Pull it straight off. Avoid twisting or yanking. If there’s any old adhesive or residue, you can gently clean it with a damp cloth. Ensure the hearing aid’s sound port is clear and dry before attaching the new tube.
Fitting the New Hearing Aid Tubing
With the old tubing gone, it’s time to install the new. This is where your new tubing will bring fresh life to your hearing aids.
Preparing and Cutting the New Tubing
Take your new tubing and measure it against the old piece. You want the new tubing to be the exact same length. If you don’t have the old piece for comparison, you’ll need to attach it and then trim it. Once you have the correct length, use your sharp scissors or craft knife to make a clean, straight cut. A clean cut ensures a good seal.
Attaching the Tubing to the Earmold
Gently insert one end of the new tubing into the earmold connector. Push it in firmly until it feels secure. You might need to apply a little steady pressure. Make sure it’s seated all the way in. This connection needs to be airtight for optimal sound. If it feels loose, it might not be inserted far enough, or you might have the wrong size tubing. If the tubing feels loose, it might be the wrong size tubing.
Connecting the Tubing to the Hearing Aid
Now, take the other end of the tubing and connect it to the hearing aid’s sound outlet. Similar to the earmold, push the tubing on until it’s snug and secure. Again, a good seal is important here. Ensure there are no gaps or leaks. If you’re unsure about the length, you can attach it first, put the hearing aid on, and then ask someone to check the fit. If it’s too long, you can trim a small amount off the end.
Final Checks and Maintenance Tips
You’ve successfully replaced your hearing aid tubing! Before you start enjoying your clearer sound, let’s do a quick check.
Testing the Sound Quality
Put your hearing aids in and listen carefully. Do they sound clear? Is the volume at the right level? Are there any whistling or feedback sounds? If everything sounds good, congratulations! If you notice any issues, double-check that both ends of the tubing are securely attached and that there are no kinks or obstructions. Sometimes, simply reseating the tubing can solve the problem.
Keeping Your Tubing in Great Shape
To extend the life of your new tubing, follow these simple maintenance tips:
- Clean Regularly: Wipe down the tubing with a soft, dry cloth daily.
- Avoid Moisture: Never submerge your hearing aids or tubing in water. Moisture can damage the electronics.
- Store Properly: When not in use, store your hearing aids in a dry place, preferably in a dehumidifier box.
By taking these small steps, you can ensure your hearing aids continue to perform at their best. Remember, replacing the tubing is a simple but vital part of hearing aid care.
When to Call Your Audiologist
While replacing tubing is a common DIY task, there are times when you should seek professional help. If you encounter any difficulties during the replacement process, or if you’re uncomfortable performing the task yourself, don’t hesitate to contact your audiologist. They have the expertise and specialized tools to handle any hearing aid maintenance. Also, if you replace the tubing and still experience sound quality issues, it could indicate a problem with the hearing aid itself or the earmold. Learn whether you can replace a hearing aid receiver yourself. Your audiologist can diagnose and fix these more complex problems. They are there to help ensure your hearing aids are always working perfectly for you.
“`Conclusion
You’ve learned that replacing your hearing aid tubing is a straightforward DIY task. By following these steps, you can maintain your hearing aids and ensure clear sound quality. Remember to check for signs of wear, gather your supplies, and carefully remove the old tubing before fitting the new. Taking this simple maintenance step every six months, or as needed, will help keep your hearing aids performing at their best. If you ever feel unsure or encounter problems, don’t hesitate to reach out to your audiologist for expert assistance. You’ve got this!
Frequently Asked Questions
How often should I replace my hearing aid tubing?
Most audiologists recommend replacing your hearing aid tubing approximately every six months. However, you should inspect it more often. If you notice any signs of wear like discoloration, stiffness, or cracks, it’s best to replace it sooner.
Can I use regular tubing, or do I need special hearing aid tubing?
You must use specialized hearing aid tubing. Standard tubing will not fit correctly and can negatively impact sound quality or even damage your hearing aids. Always confirm the correct size and type with your audiologist or the manufacturer.
What if the new tubing feels too loose or too tight?
If the tubing feels too loose, it might not be fully seated, or you may have the wrong diameter. If it’s too tight, it could be the wrong size, or you might need to trim it slightly. Double-check the tubing size recommended by your audiologist. Gently reseating the tube is usually the first step.
Is it safe to use scissors or a knife to cut the tubing?
Yes, using small, sharp scissors or a craft knife is safe for cutting the tubing, provided you are careful. A clean, straight cut is essential for a good seal. Always cut away from yourself and hold the tubing firmly to avoid accidental slips.
What should I do if I can’t remove the old tubing?
If the old tubing is very stiff and won’t budge, try using a small amount of warm water on the connection point to soften it. Gentle wiggling can also help. If it remains stuck, or you fear damaging the earmold or hearing aid, it’s best to contact your audiologist. They have specialized tools and expertise.